About Me

My photo
Vermont
Check my shop on Etsy. http://www.etsy.com/shop/UpcycleRecycleReuse

Search This Blog

Showing posts with label gift cards. Show all posts

Sunday, April 1, 2012

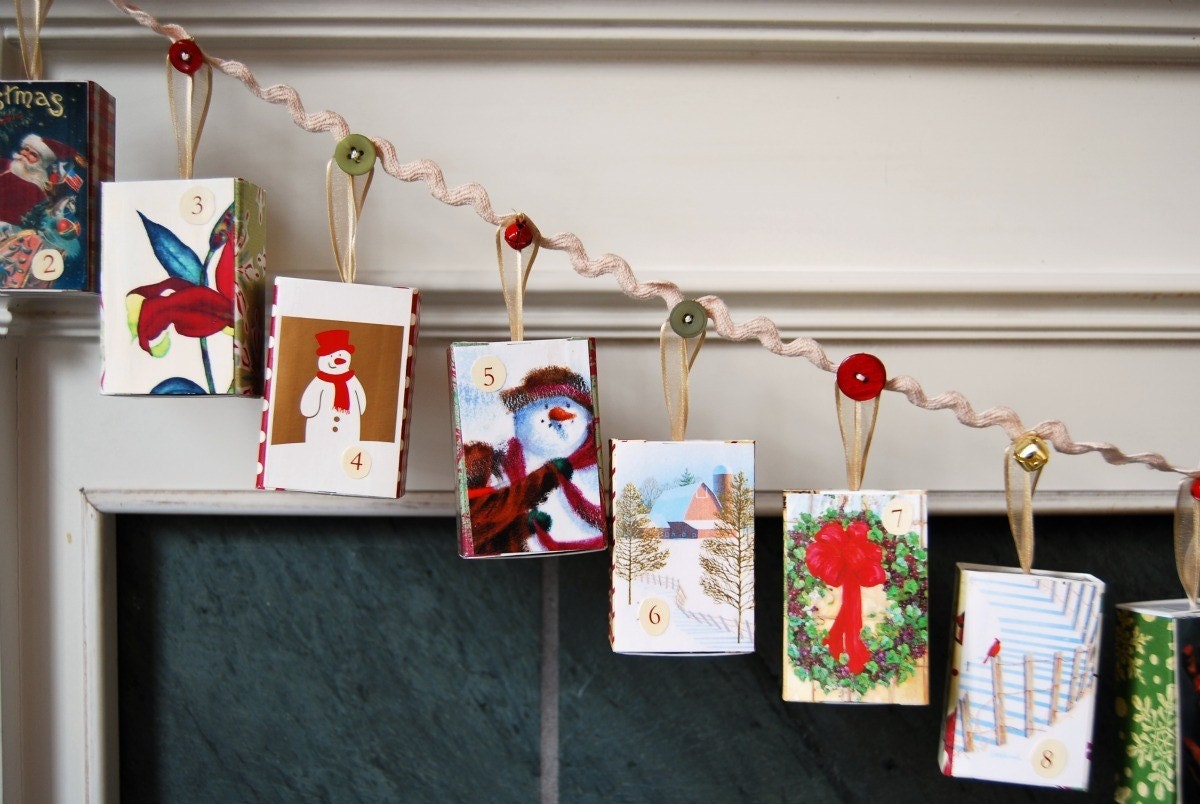
Birdhouses from Greeting Cards
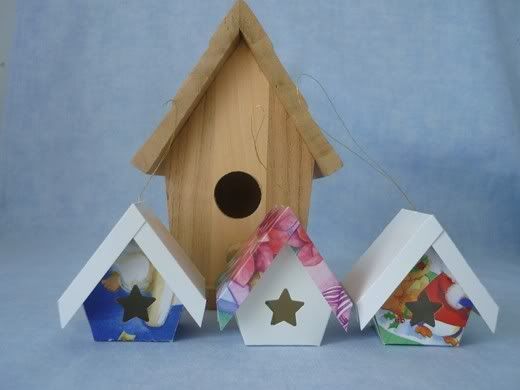
Birdhouses from Greeting Cards

Photobucket

After I had made the greeting card village ornaments I decided that I wanted to make some birdhouse ones. Since the angles for these ones were not as straight forward I couldn't just score the patterns directly on the greeting cards. I made patterns with graph paper first.

If you'd like a pdf version of the pattern for my birdhouses you can click this link. (If you don't have access to a printer you can consult the pattern to draw your own. I drew the four sections of the house on 1/4 inch graph paper and then taped them together.)

After I had made the pattern I taped it to the back of the greeting card front. (This pattern will fit on any card that is larger than approximately 4 x 6 inches.) I took a sharp pin and poked some holes to indicate where the fold lines and the entrance would be. (One mark near either end of every fold line is sufficient.)

Photobucket

Then I cut around the pattern.

Photobucket

I scored all the fold lines and used a soft pencil to make a line to mark the centre line of the entrance. Then I punched the entrance ...

Photobucket

... creased all the fold lines ...

Photobucket

... and placed a piece of double sided tape on the tab.

Photobucket

I rolled the house, removed the backing from the tape and stuck the tab to the inside of the front wall. (If I had used use glue instead of double sided tape I would have folded up one piece of the base and used something like a clothespin to clamp the tab to the front wall. Alternatively I could have eliminated the tab and used tape, like I did on the greeting card village ornaments.)

Photobucket

Next I assembled one side of the roof. I used double sided tape to attach the adjacent flaps to the roof piece. (Again if I had used use glue I would have used something like a clothespins to clamp the pieces together.)

Photobucket

Then I attached the two remaining flaps to the other side of the roof. (If I had used glue I would have laid this side of the roof down on my work surface until the glue was set.)

Photobucket

Next I assembled the base. I folded up the two rectangular pieces then used double sided tape to attach the other two pieces of the base. I inserted the handle of a small paint brush in the punched entrance to press the layers together.

Photobucket

Then I was ready to assemble the outer roof. Because of the simple geometry I could have used my quilt ruler to score the pattern directly onto the back of the card, like I had on the greeting card village ornaments. Instead I taped, marked and cut out the pattern like I had the larger piece of the birdhouse.

Photobucket

I scored the fold lines. Then I folded the hanging thread in half, knotted the two ends together ...
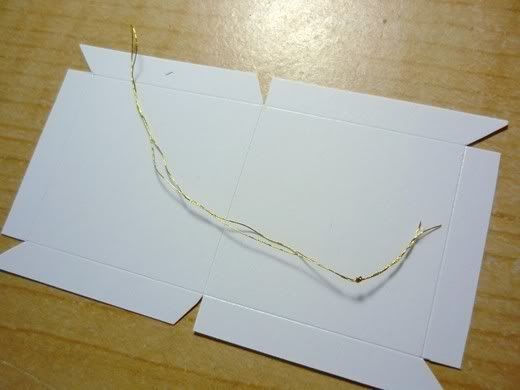
Photobucket

... and used a needle and thread to pull the folded end from the inside to the outside of the roof.
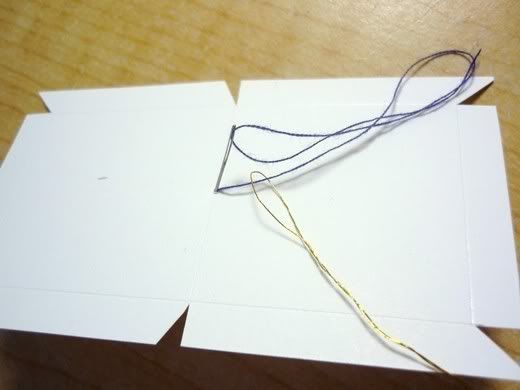
Photobucket

Next I creased the fold lines of the outer roof.
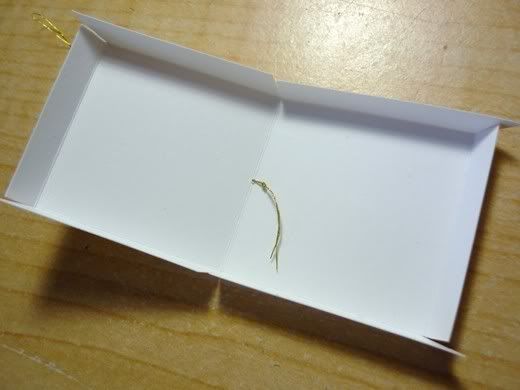
Photobucket

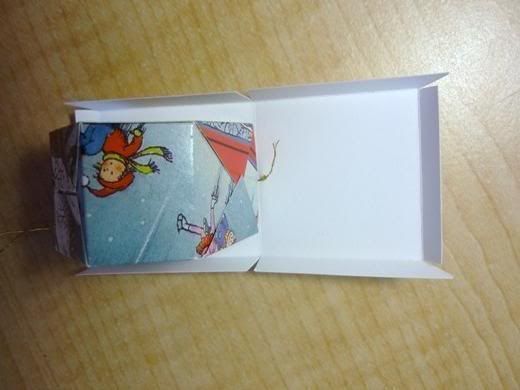
I applied some fast drying glue to one side of the house roof and gently laid it on Side A of the outer roof so that the roof peaks were together and the house was centred. (Side A has the notch at the centre front.) When it was in place I pressed the house against the outer roof. If I had used regular glue I would have left it laying like this until the glue was dry.
Photobucket

Then I applied glue to the other side of the house roof and pressed the remaining half of the outer roof in place. When the roof was in place there was a bit of the trim extending above the roof. I placed a spot of glue between the two pieces of trim on the front and pressed them together. Then I glued the two pieces of trim on the back of the birdhouse together.

Photobucket

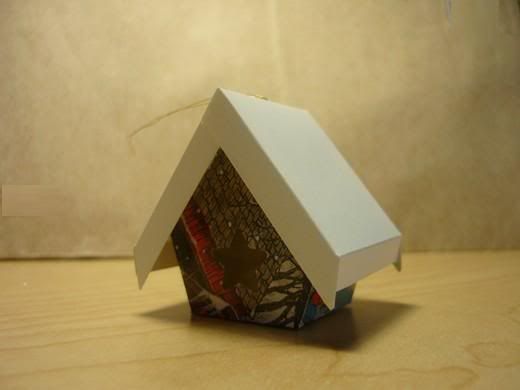
When the glue was set I used scissors to carefully cut the trim flat against the roof.
Photobucket

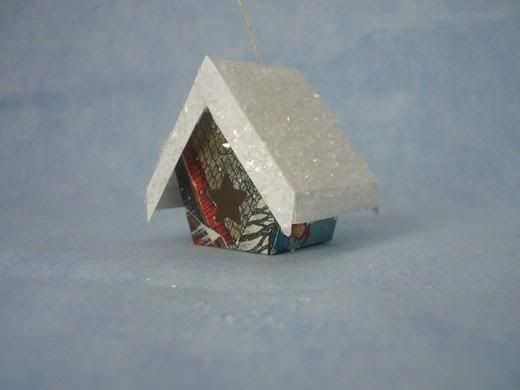
For this birdhouse I decided to add a bit of glitter to the roof. I painted some white glue on the surfaces of the outer roof and then sprinkled the glitter over the roof. When it was dry, and the excess glitter poured back into the container, it looked like this.
Photobucket

Most of the greeting card birdhouses I have made have had colourful (front of the greeting card) walls and a snowy white (back of the greeting card) outer roof. A birdhouse with white walls and a colourful roof can work well too.

Photobucket

Note. I used the star shaped punch because it was the only one I had that was the right size. If I hadn't had my star punch here are some alternatives I would have tried. Going clockwise the green circle was cut from a greeting card, the small blue circle is a hole made with a regular hole punch, the red star is a sticker and the blue diamond is a hole cut with a mat knife. Another possibility is a 1/2 inch round sticker, which may be found where office supplies are sold.

Thursday, December 1, 2011

Make Your Own Cards - Upcycle

Make Your Own Cards

...is an Eco-friendlier Gift!

In a world where conversation is just a click away, greeting cards, post cards and letters have become a rare treat.

Think back to the last time you received a hand-written message from a friend or family member. The excitement of finding a special note in your mailbox is one that you can give to someone any time of the year.

No special occasion is necessary to send a greeting - after all, it's the thought that counts!

Recycled Christmas Cards


Don't wait for someone else to write the perfect card for you! Make your own and send a personalized greeting to the ones you love. With just a few simple supplies and the right attitude, anyone can create memorable cards that will be cherished. Making your own cards is not only rewarding, but better for the environment, too.

handmade christmas cards

Wednesday, November 30, 2011

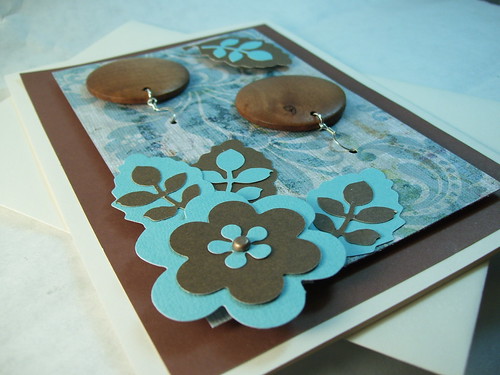
Upcycle button card - tutorial


What a great way to present someone with a collection of pretty buttons!

You can also make the buttons part of an image, as in this flower garden design.   

If you want to give a small gift to a crafter, try this card project. Vintage buttons are attached to the card with pipe cleaners, so the recipient can easily take them off for use in another crafty project.

What you'll need:
  • One or two blank cards
  • Chalk
  • Coordinating decorative paper
  • Glue stick
  • Scissors
  • Assortment of shank buttons
  • A pipe cleaner stem that matches your card
  • X-Acto knife
  • Self-healing cutting board
  • Wire cutters
  • Craft glue (optional)
  • Assorted ribbon or rickrack (optional)
The buttons can match, like these leather ones, or be a mix of different colors and styles. A note on buttons: This project is designed for shank buttons. But if you have some cool sew-through buttons, you could always sew them to a card by adapting the techniques in my embroidered card tutorial.

. . . And a note on the cardstock: Because buttons can be heavy, you need to use a very heavyweight cardstock for this project. I like 80-lb. stock or heavier. If you have blank cards that are lighter weight, just glue two of them together using a glue stick.

Let's Begin...


First, decide how you'd like the buttons arrayed on the card.

Place an assortment of buttons on the card and move them around until you have a configuration you like. Set the buttons aside in this configuration, or take a digital picture so you don't forget the arrangement.


Cut a hole where you want the center of the button to be.

Decorate the card as you like by gluing on decorative papers using a glue stick. You can have the buttons be the decorative main event, or they can be part of a design, as in my flower card above. The buttons provide a lot of visual complexity, so I tend to keep my card designs simple.

Now it's time to make some tiny holes in the card, so the shanks of those buttons can pass through. I'm using a low-fi approach here by cutting them with an X-Acto knife. Depending on the design of your card, you may be able to use a standard hole punch or an eyelet punch instead.

Anyway, make a small hole where you want the center of each button to be. (And when I cut them with the X-Acto, I cut rectangular holes because it's easier than cutting round ones.)


When you poke the button shank through the card, you should be able to see through the hole.


Adjust the sizes of the holes to accommodate the different sizes of button shanks.

Test each button as you make a hole for it—every button is made a little differently, and the shanks are different sizes. You may need to adjust some of those holes a little with the X-Acto knife. The hole should be just large enough that the entire shank can pass through it, and you can see through the hole in the shank.


Feed the pipe cleaner through the button shank.

Once you know all the button shanks will fit the holes in the card, then it's time to attach them. Poke the shank of a button through a hole. Then, on the back of the card, feed a piece of pipe cleaner through the hole in the button shank so that it pokes about 1/4 inch through.


Trim the pipe cleaner to about 1/2 inch.

Trim the other end of the pipe cleaner to about 1/4 inch beyond the shank with wire cutters. (A tip: I find it much easier to feed the long piece of pipe cleaner through the button and then trim it short. It's fairly fiddly to work with precut pieces of pipe cleaner.)

Repeat this process with the remaining buttons.


Decorate the card with ribbon or rickrack.

If you like, you can also embellish the card by gluing on some ribbon or rickrack.

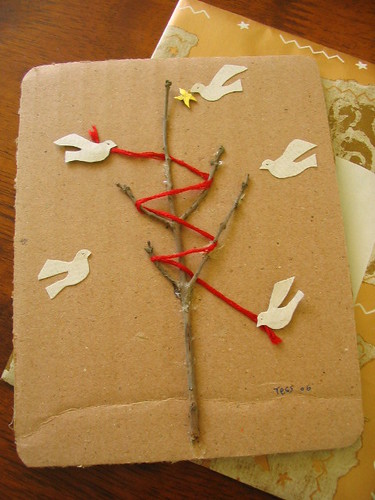
Upcycled Gift Cards - Red garland - doves


handmade christmas card

Another Great Upcycle Find

Friday, November 18, 2011

Potato Stamp Art - Christmas Cards

You will need...
1. mini cookie cutters I found (you can always draw your own design onto the potato),
2. one medium/large potato,
3. a pearing knife,
4. an ink pad,
5. and recycled homemade paper.

How to make the stamp...
1. First you cut the potato in half and take the cookie cutter of your choice, center it, and press down firmly into the potato.
2. With the cookie cutter still in the potato, cut about 1/4″ from the top, throwing away all the excess potato edges.
3. Remove the cookie cutter, and voila you have your stamp!

_MG_1853

How to make your cards, tags, etc...
1. Next, choose your paper.
2. Cut the paper down to size (mine are 4″x6″ postcards) and stamp away!
3. Make sure to ink your stamp well the first time and maybe use some test paper too.

Thursday, June 23, 2011

Hand Made Card Ideas


SUPPLIES:   
Cardstock: (kraft) Papertrey Ink   
Clear stamp: (sentiment from Magical Moments set) Wplus9 Design Studio   
Pigment ink: (Onyx Black) Tsukineko   
Color media: (orange, green colored pencils) Prismacolor; (white gel pen) Sanford; (brown marker) Stampin' Up!   
Digital element: (flower stamp from Lily Stems w/Oval kit) www.tiffanydoodles.com   
Software: (photo editing)   
Tool: (corner rounder punch) We R Memory Keepers   

Finished size: 4" x 5 1/4"

1 Create finished size project in software. Stamp flower; print on cardstock. Trim and fold into card.
2 Color flower.
3 Stamp sentiment. Round one corner.


SUPPLIES:
Cardstock: (Rustic Cream, kraft) Papertrey Ink   
Clear stamps: (sentiment from Daily Design Sentiment set) Papertrey Ink; (leaf from Flowers set) We R Memory Keepers   
Chalk ink: (Jumbo Java, Tea Leaves) Tsukineko   
Color medium: (green marker) Copic   
Accents: (pink flowers with buttons) Sassafras Lass   

Finished size: 4 1/4" x 5"

1 Make card from cardstock.
2 Stamp leaves and draw stems with marker.
3 Adhere flowers.
4 Stamp sentiment on cardstock. Trim and adhere with foam tape.


SUPPLIES:
All supplies from Papertrey Ink unless otherwise noted.
Cardstock: (kraft, white)  
Clear stamps: (sentiment from Made with Love set) Hero Arts; (polka dot tab from Mini Scrapbook Series: Tabs set)
Pigment ink: (Raspberry Fizz)   
Specialty ink: (Dark Chocolate hybrid)   
Accent: (pink button)
Fibers: (brown/white twine)

Finished size:  3 1/2" x 5 1/2"

1 Make card from cardstock; stamp polka dot tabs.
2 Stamp sentiment on card and cardstock strip. Adhere cardstock strip.
3 Thread button with twine.  

Note: Loop twine and knot ends to create butterfly. Adhere.