


Simple ornaments for Christmas

Upcycle, Recycle, Reuse is where old products are given more value not less. The goal of this shop is to prevent wasting potentially useful materials by making use of existing ones. The posts on this blog are mostly of others who follow the same creed. Check out all the great finds!
About Me

- Upcycle, Recycle, Reuse
- Vermont
- Check my shop on Etsy. http://www.etsy.com/shop/UpcycleRecycleReuse
Showing posts with label birds. Show all posts
Showing posts with label birds. Show all posts
Wednesday, November 21, 2012


Monday, June 18, 2012
Gardener's Hand Lotion Bars - Recipe
Lotion Bars
Give your hands a break with garden-inspired moisture.
Garden bars are a godsend for rough, raw gardener’s hands. And when I
make them from oil infused with the fruits of my gardening labor, I
feel as
if things have come full circle.
So what are garden bars—or lotion bars, as many know them? They look a lot like bars of soap, but they’re not. You don’t clean with garden bars, but instead moisturize with them. Basically, they’re just like lotion, but in solid form.
Made from everyday ingredients, they’re easy to mix up by the batch in your kitchen.
What You Need
½ cup herbal-infused olive oil
½ cup coconut oil, melted
½ cup beeswax, melted
Simple molds
Directions
To give your lotion bars a garden touch, infuse olive oil with herbs and flowers. Use about 2 tablespoons of dried herbs per half cup of oil. Heat and allow to cool. Leave the herbs in the oil for a few days to a couple of weeks, and then strain.
Once your oil is ready, combine ingredients in a small, heat-safe mixing bowl. Stir well to combine. If the mixture is cloudy, reheat over hot water until it becomes clear.
Fill molds halfway. The bar shown here was made in a single-serve plastic fruit cup. Muffin tins work, too.
Let cool completely, and then pop the bars out of the molds. They should release easily.
Additional Tips
To use your lotion bar, let the warmth of your hand melt the surface slightly and then rub the lotion into skin.
Other oils work well in place of olive or coconut oil. Just be sure to use oils that are similar in consistency.
For added fragrance, use several drops of essential oil (found at craft stores) in the mixture.
Coconut oil is available at the supermarket. Beeswax can be found in the candle section of craft stores.
Source: http://www.birdsandblooms.com/Backyard-Projects/Garden-Crafts/Lotion-Bars
So what are garden bars—or lotion bars, as many know them? They look a lot like bars of soap, but they’re not. You don’t clean with garden bars, but instead moisturize with them. Basically, they’re just like lotion, but in solid form.
Made from everyday ingredients, they’re easy to mix up by the batch in your kitchen.
What You Need
½ cup herbal-infused olive oil
½ cup coconut oil, melted
½ cup beeswax, melted
Simple molds
Directions
To give your lotion bars a garden touch, infuse olive oil with herbs and flowers. Use about 2 tablespoons of dried herbs per half cup of oil. Heat and allow to cool. Leave the herbs in the oil for a few days to a couple of weeks, and then strain.
Once your oil is ready, combine ingredients in a small, heat-safe mixing bowl. Stir well to combine. If the mixture is cloudy, reheat over hot water until it becomes clear.
Fill molds halfway. The bar shown here was made in a single-serve plastic fruit cup. Muffin tins work, too.
Let cool completely, and then pop the bars out of the molds. They should release easily.
Additional Tips
To use your lotion bar, let the warmth of your hand melt the surface slightly and then rub the lotion into skin.
Other oils work well in place of olive or coconut oil. Just be sure to use oils that are similar in consistency.
For added fragrance, use several drops of essential oil (found at craft stores) in the mixture.
Coconut oil is available at the supermarket. Beeswax can be found in the candle section of craft stores.
Source: http://www.birdsandblooms.com/Backyard-Projects/Garden-Crafts/Lotion-Bars
Sunday, April 1, 2012
Birdhouses from Greeting Cards
Birdhouses from Greeting Cards

After I had made the greeting card village ornaments I decided that I wanted to make some birdhouse ones. Since the angles for these ones were not as straight forward I couldn't just score the patterns directly on the greeting cards. I made patterns with graph paper first.
If you'd like a pdf version of the pattern for my birdhouses you can click this link. (If you don't have access to a printer you can consult the pattern to draw your own. I drew the four sections of the house on 1/4 inch graph paper and then taped them together.)
After I had made the pattern I taped it to the back of the greeting card front. (This pattern will fit on any card that is larger than approximately 4 x 6 inches.) I took a sharp pin and poked some holes to indicate where the fold lines and the entrance would be. (One mark near either end of every fold line is sufficient.)

Then I cut around the pattern.

I scored all the fold lines and used a soft pencil to make a line to mark the centre line of the entrance. Then I punched the entrance ...

... creased all the fold lines ...

... and placed a piece of double sided tape on the tab.

I rolled the house, removed the backing from the tape and stuck the tab to the inside of the front wall. (If I had used use glue instead of double sided tape I would have folded up one piece of the base and used something like a clothespin to clamp the tab to the front wall. Alternatively I could have eliminated the tab and used tape, like I did on the greeting card village ornaments.)

Next I assembled one side of the roof. I used double sided tape to attach the adjacent flaps to the roof piece. (Again if I had used use glue I would have used something like a clothespins to clamp the pieces together.)

Then I attached the two remaining flaps to the other side of the roof. (If I had used glue I would have laid this side of the roof down on my work surface until the glue was set.)

Next I assembled the base. I folded up the two rectangular pieces then used double sided tape to attach the other two pieces of the base. I inserted the handle of a small paint brush in the punched entrance to press the layers together.

Then I was ready to assemble the outer roof. Because of the simple geometry I could have used my quilt ruler to score the pattern directly onto the back of the card, like I had on the greeting card village ornaments. Instead I taped, marked and cut out the pattern like I had the larger piece of the birdhouse.

I scored the fold lines. Then I folded the hanging thread in half, knotted the two ends together ...

... and used a needle and thread to pull the folded end from the inside to the outside of the roof.

Next I creased the fold lines of the outer roof.

I applied some fast drying glue to one side of the house roof and gently laid it on Side A of the outer roof so that the roof peaks were together and the house was centred. (Side A has the notch at the centre front.) When it was in place I pressed the house against the outer roof. If I had used regular glue I would have left it laying like this until the glue was dry.

Then I applied glue to the other side of the house roof and pressed the remaining half of the outer roof in place. When the roof was in place there was a bit of the trim extending above the roof. I placed a spot of glue between the two pieces of trim on the front and pressed them together. Then I glued the two pieces of trim on the back of the birdhouse together.

When the glue was set I used scissors to carefully cut the trim flat against the roof.

For this birdhouse I decided to add a bit of glitter to the roof. I painted some white glue on the surfaces of the outer roof and then sprinkled the glitter over the roof. When it was dry, and the excess glitter poured back into the container, it looked like this.

Most of the greeting card birdhouses I have made have had colourful (front of the greeting card) walls and a snowy white (back of the greeting card) outer roof. A birdhouse with white walls and a colourful roof can work well too.

Note. I used the star shaped punch because it was the only one I had that was the right size. If I hadn't had my star punch here are some alternatives I would have tried. Going clockwise the green circle was cut from a greeting card, the small blue circle is a hole made with a regular hole punch, the red star is a sticker and the blue diamond is a hole cut with a mat knife. Another possibility is a 1/2 inch round sticker, which may be found where office supplies are sold.
Monday, March 5, 2012
Spring Items - Upcycle, Recycle, Reuse
Just Sold
~ Birds and Spring Blooms Gift Box
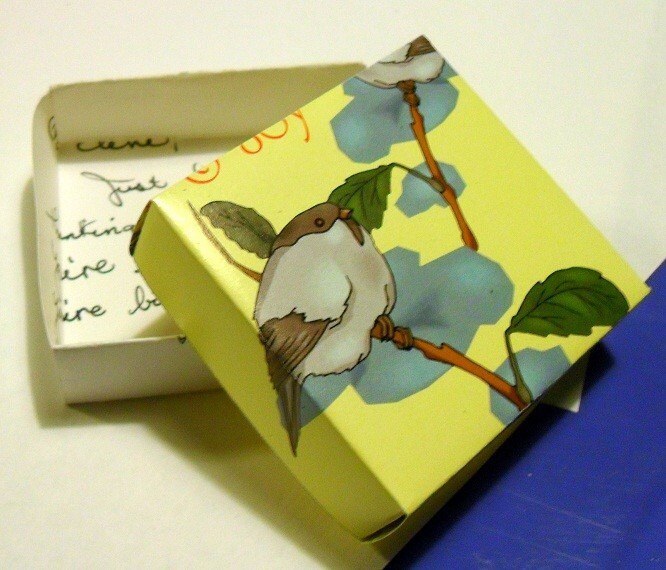


* 3/4 inches deep
* 2 1/2 inches tall
* 2 5/8 inches wide
*** Peace & Joy Bird on a branch with Blue Blooms (Top)
*** For Many Seasons To Come... May the holidays bring
you many joys and smiles (Top Inside)
*** Hallmark (Bottom)
*** Hand Written Note "Just have been thinking of you
and hope you are fine - I know you're busy, but
Mary was soo happy at your thoughtfulness."
(Bottom Inside)
For Sale ~ Handmade Spring Envelopes, Flower & Bird
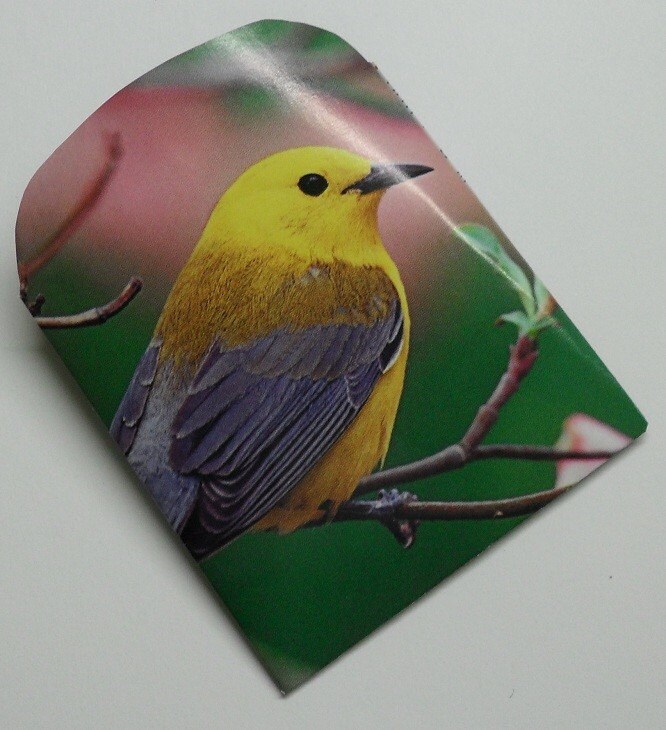


They also come with 4 pcs small round perforated clear envelope seals.
Size of envelopes : Approx 3.25 in length x 3.25 in width
Quantity : 2 pcs
Size of seals : 1 in diameter
Quantity : 4 pcs
Note to buyer: Since these envelopes are handmade, cut and glued by myself some slight size variances exist for each envelope.
For Sale ~ Spring Garden - Tulips and Birches - Handmade Envelopes
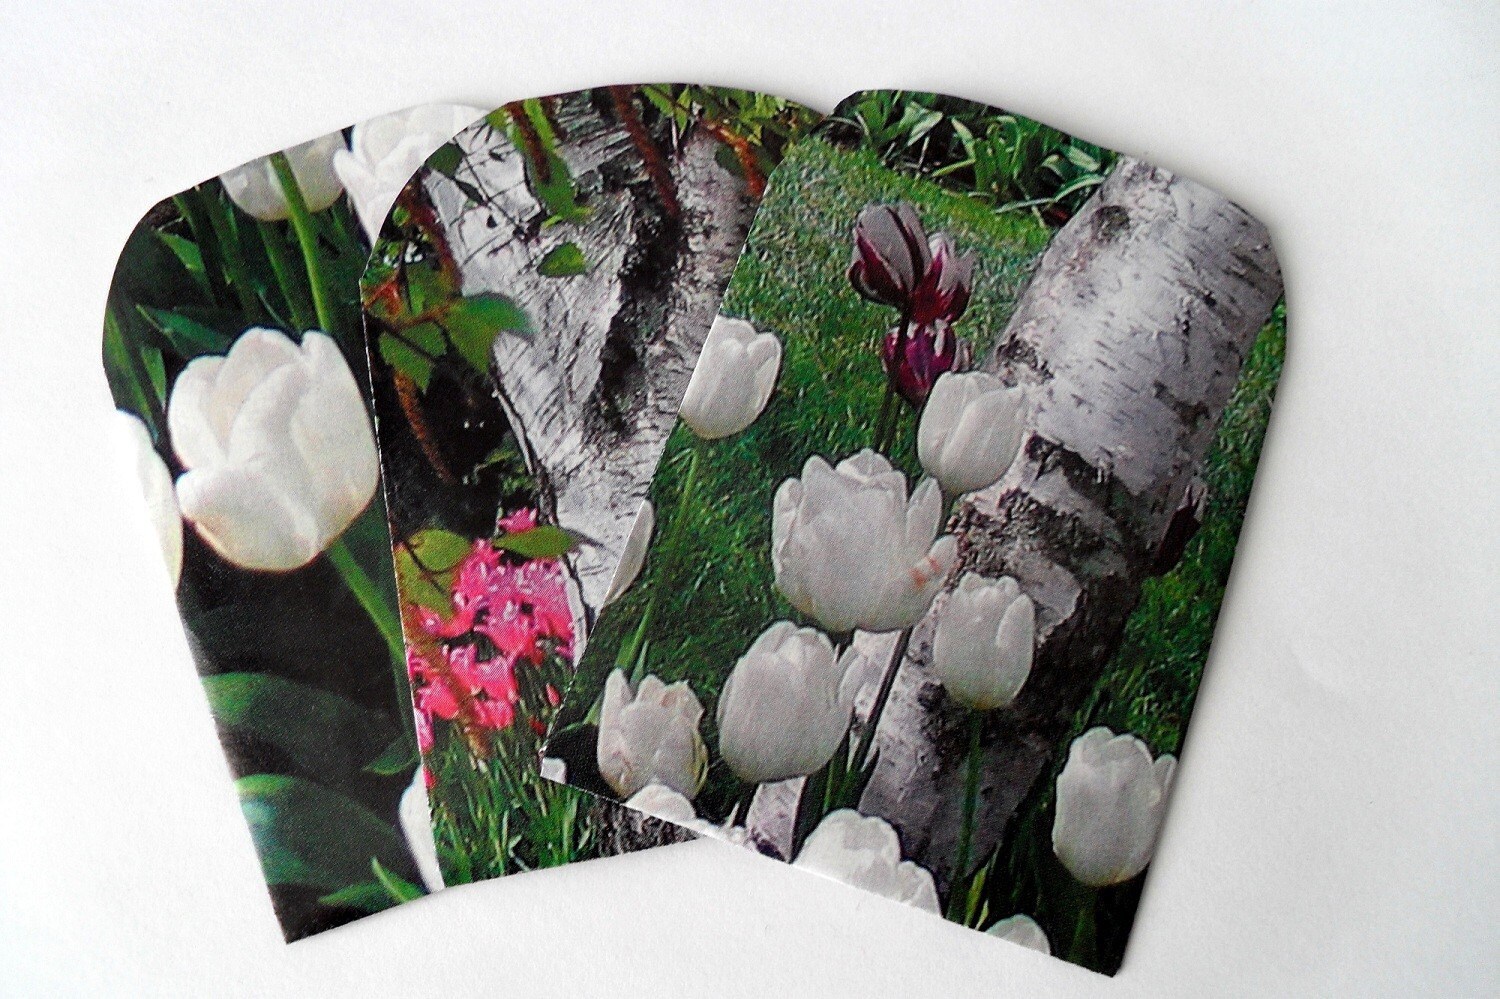


These envelopes also come with 6 pcs small round perforated clear envelope seals.
Size of envelope : Approx 2.5 in. length x 2.375 in. width
Quantity : 3 pcs
Size of seals : 1 in. diameter
Quantity : 6 pcs
Note to buyer: Since these envelopes are handmade, cut and glued by myself some slight size variances exist for each envelope.
For Sale ~ Handmade Upcycled Envelopes with Spring Bulbs, and Bird Nest


These envelopes also come with 6 pcs small round perforated clear envelope seals.
Size of envelope : Approx 2.5 in. length x 2.375 in. width
Quantity : 3 pcs
Size of seals : 1 in. diameter
Quantity : 6 pcs
Note to buyer: Since these envelopes are handmade, cut and glued by myself some slight size variances exist for each envelope.
Sunday, December 4, 2011
felt ornaments and more ideas...
image source


image source


handmade ornaments
Handmade Felt Keyrings
image source
felt ornaments
gift, snowman, tree, ornament ball
felted ornaments
felted ornaments using a wet felting technique to make a felt ball (wool + soap + hot water + friction) and then needle felted the snowflake design onto the fall. they are strung with waxed coated linen.
Red Felt Owl Ornament
Sweet little felt owl ornaments. Other colors are available.
Subscribe to:
Posts (Atom)