About Me

My photo
Vermont
Check my shop on Etsy. http://www.etsy.com/shop/UpcycleRecycleReuse

Search This Blog

Showing posts with label Tin can. Show all posts

Wednesday, October 10, 2012

Upcyceld Tin Cans - Art inspired


We all use some canned foods from time to time.  And we all probably use empty cans for one purpose or another.  This inscrutable shows how to decorate cans to be used as organizers for pencils, pens, paint brushes, etc.  It's a simple thing to do, and children would especially have fun making their creations.

Can Art: A Way To Recycle Some Tin Cans


1.      Prime the cans so the glue sticks
2.   Make the tiles. I painted Styrofoam and cut it into tile shapes. (Use whatever you have at hand.)
3.      Glue tiles to primed can
4.      Grout spaces between tiles and wipe off excess.

Tutorial:
http://www.instructables.com/id/Can-Art-A-Way-To-Recycle-Some-Tin-Cans/#step1

Wednesday, October 3, 2012

Recycled Daisy Magnets

Recycled Daisy Magnets

Recycled Daisy Magnets
Brightly coloured daisy magnets from South Africa made from recycled drink cans. Each flower is a different combination of colours and patterns depending on the tin that has been used. They are not only gorgeous they display an impressive ability to find value in something we assume is valueless.

Sunday, July 29, 2012

Airplane - Recycled Tins

Aeroplane Made From Recycled Tins

Aeroplane Made From Recycled Tins 
 
Each plane is a different combination of tins and therefore different colours and patterns. The planes are made in Madagascar and this little industry helps support people whose lives are so very much harder than ours simply because of the place of their birth.

A wonderful hand made and fair-trade gift 

http://www.ethikl.com.au/Aeroplane-Made-From-Recycled-Tins.html

Monday, November 28, 2011

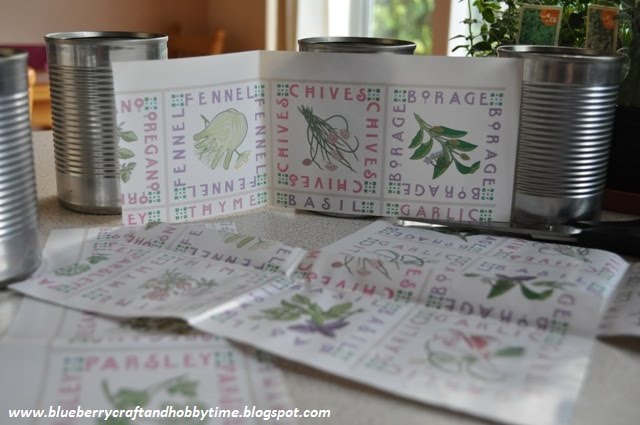
Upcycled Herb Garden

How to get your Herb Garden at home


Herbs are easy to grow at home and it's a great way to add color and fresh herbs to your cooking.You can add them to almost any recipe.

Try this simple instructions of creating new containers for your herbs. What a great idea to have them on the windowsill close to place where you cook.

What you will need to make this project:

  • Metal can ( I used food can)
  • Herbs (pick whichever you use the most)
  • Decorative paper
  • PVA glue
  • clear varnish
  • brush
  • scissors
  • hammer/screwdriver or simply drill


Use drill or hammer and screwdriver to make holes in the can so if there is too much water it can come out


Cut your decorative paper to fit the shape of the container.

I found this herb design paper and I thought it will be perfect for this project


Spread the PVA glue on to the container, don't use too much


Stick your paper to the containers


Once it dries, you can put a coat of clear varnish. If you want to make it more shiny,
after the first coat dries put second or third layer.


Wait for the varnish to dry and then you can start planting your herbs


And that's it you done. Now you can pick your chosen herb whenever you need it.


Friday, November 18, 2011

Weekend Project- Hanging Planters


I came across this crafty little DIY project idea yesterday which combines two of my favourite things, recycling and decoupage.  Wabi-Sabi Wanderings created them which I'm thinking would be fun hanging under a veranda outdoors for the summer.  Click here to see.